While working on the computer, there will be many times when you want to split the screen in half to conveniently monitor content or copy content more easily. Often when working, content is separated into separate windows or tabs and operations are not related to each other. When working on one window, the other windows are hidden. Splitting the screen will save the need to switch between tab interfaces or each window so we can monitor the content. Even in Windows, there is a split screen feature so you don't have to manually resize each window. The article below will guide you how to split your computer screen in half.

How to split the screen in half in Windows 10
Method 1: Split the screen in half with the mouse
1. First, if you want the screen to display on the right, use the mouse to click and hold that window and drag it close to the right edge of the screen. Immediately that window will display in half of the screen interface.

2. Next, the window we want to display on the left side of the screen, we will drag it close to the left edge. And so the screen has been divided into two as shown below.

Method 2: Split the screen in half using keyboard shortcuts
1. For any window that displays the left half, the user clicks on that window and then presses the key combination Windows + ← (left arrow key). Next, with the window displayed on the right, we click on the Windows icon + → (right arrow key). At this time, the 2 windows will be moved to 2 sides of the same size.
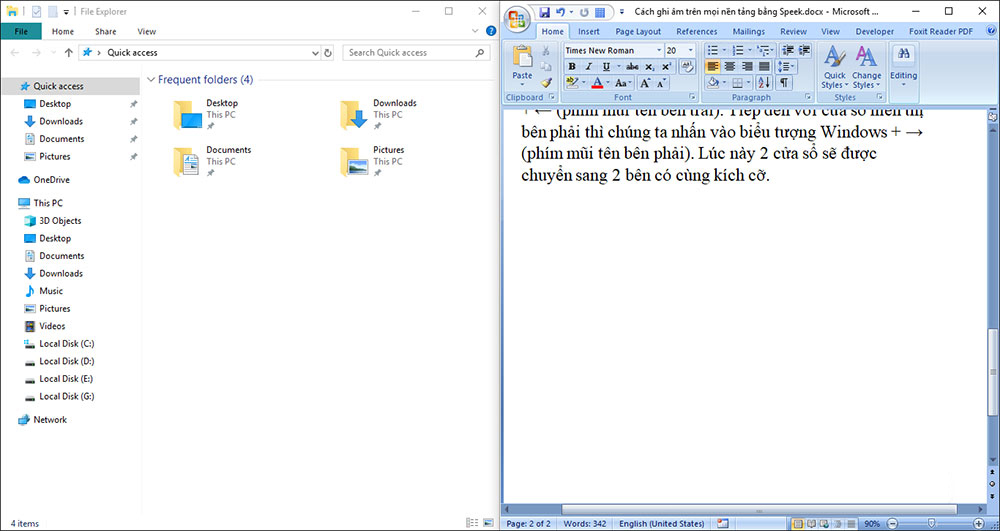
2. If you use Windows 10, when you put a window on the left edge of the screen, the interface of the windows currently working on the computer will be displayed. Now users just need to click on a window to display it on the right edge interface.

3. In addition to splitting the screen in half, we can divide the screen into 3 or 4 by using the Windows key combination + arrows.

With the split screen feature available on the computer, we can divide the screen into up to 4 different parts to observe the content and documents that need to be compared. You can use keyboard shortcuts or the mouse.
How to split the screen in half in Windows 11
Basically, you can use the same method as for Windows 10 above to access split-screen mode on Windows 11. Additionally, you can also use the built-in Snap Windows feature to Quickly pin your apps to different corners of the screen.
With the Snap Windows split screen feature in Windows 11, you can use multiple applications and programs at the same time on your screen. In addition, you can also pin different applications to the edges and corners of the screen for more flexible operation.
To get started, first enable the Snap Windows feature by navigating to Settings > System > Multitasking, then turn on the “Snap Windows” option.

When you're ready to split your device's screen in half, press the Windows + Z key combination on your keyboard. In the top right corner of the screen, you will see various layout options to choose from. Here, click on the screen layout you want to use to pin your open apps.

Windows 11 will pin your current app in the selected layout. The system will then ask you to select other applications to place in the remaining empty slots in the selected layout.

Wishing you success and always having a good experience with your PC!


No comments:
Post a Comment