Whether you're upgrading from HDD to SSD or installing a larger capacity drive, this is the easiest way to migrate your existing Windows operating system installation and all data to another drive.

How to move Windows to another drive using Macrium Reflect
Note: To prevent any problems, make sure the new drive has the same or more capacity than the current drive. All data on the destination drive will be erased, so don't forget to back up anything important.
Once completed, follow these steps to move Windows to another drive:
1. Launch Macrium Reflect to begin the cloning process. In the Local Disks tab, locate and select the Windows installation drive. Then click on the Clone this disk option.
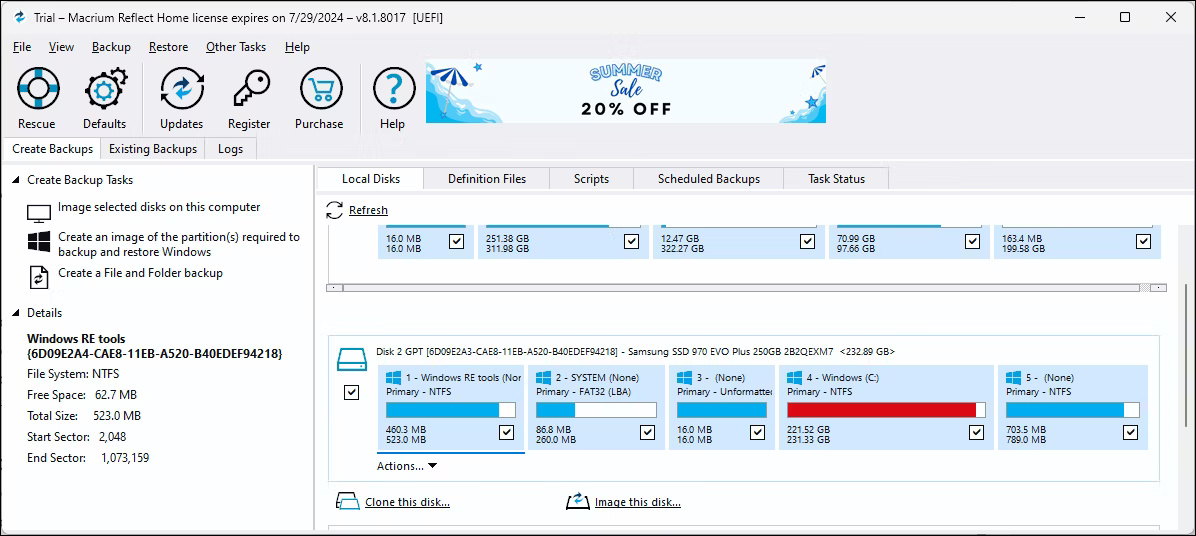
2. The New Clone dialog box will open, showing the Windows installation drive selected as the source. Make sure all partitions of the source drive are selected.

3. Now, you need to select the (new) destination drive that the Windows files will be moved to. Click Select a disk to clone to and select the destination drive from the list.

4. Then click the Erase Disk option to erase all data from the destination drive.
5. To migrate settings, select the Copy selected partitions when I click ‘Next’ option in the lower right corner. Then click Next to continue.
6. If you get the error “too many primary partitions, nothing copied”, click the Copy Partitions option and select the Shrink or extend to fill the target disk option. Click Next to continue.

7. On the next screen, you can schedule the clone. To clone immediately, click Next. Read the summary of the drive cloning process and click Finish.

8. In the pop-up menu, check the Run this backup now and Save as a backup definitionfile boxes. Agree to any warnings and click OK.

9. Depending on the drive size, this process may take some time to complete. Once the clone is complete, both drives will look the same in Macrium Reflect.
Set the new drive as the boot drive
To boot from a newly cloned drive, you may need to replace the existing SATA drive with that drive, except when switching Windows from a SATA SSD to M.2. Regardless, you will need to set your new drive as the primary boot drive in the BIOS or UEFI settings.
You can enter the BIOS on Windows 10 and 11 by pressing the F10 key during reboot. However, hotkeys may vary by manufacturer. Instead, we will use the Esc key to access the Start menu and continue from there.
1. Turn off the computer. Then press the power button to turn it on and press the Esc key continuously to see the Startup menu. In the boot menu, press the corresponding key to enter the BIOS or UEFI utility. In this case, it's F10 for HP laptops.

2. Once in the BIOS utility, go to Boot Options. Again, there may be some differences depending on the manufacturer (anything to do with 'Boot').

3. Use the arrow keys to highlight OS Boot Manager, then press Enter to select it. In the OS Boot Manager dialog box, select the newly cloned drive and press F10 to save it as the boot drive.

4. Finally, navigate to the Exit tab and select Save Changes and Exit. If successful, the computer will reboot and boot from the new drive.
Clone drive is the easiest way to move Windows 10 or 11 to another drive. In rare cases, you may experience Windows activation issues, which should resolve within 24 hours. However, keep in mind that installing the cloned drive on another computer and booting from it will not activate Windows because the digital license is tied to the system motherboard.
If you plan to install the cloned drive on a different computer or new hardware, make sure to associate your Windows product key with your Microsoft account first. You can then sign in to Windows with your Microsoft account and it will automatically activate the license.


No comments:
Post a Comment