A user account profile picture is one of the features that allows users to add changes and remove account pictures in Windows 10. User profile pictures are generally defined as avatars of accounts and comments, mostly Most of these profile pictures are used on social media. Most users add profile pictures to their social media accounts. Microsoft has included this feature for a long time, but the feature has become ubiquitous in Windows 10. Whenever you sign in to Windows 10 or Windows 11 PC, you will see the User Account Login Profile Picture in the Login screen.
By default, Windows will assign default user avatar to every user account profile, Once user profile is created, automatically windows will assign default user avatar as account picture. If you are having a lot of configurations in your system or if you want to change the default user login image for multiple computers, it is an exhausting process. Windows will allow users to set their own profile picture, but if you are running a company and want to set the company logo as default login picture then this article will guide you to Apply User Account Picture default for all users in Windows 11/10.
Change the Default User Account Image
1. To change the Profile Picture in Windows 11, open Windows Settings by pressing Windows Keys + I and clicking Accounts.
2. Under Accounts click on Your info and Under Adjust your photo, there will be two options available, you can either Take a photo or you can Choose a file.
3. Select any option to set or change the default account picture.
Where Will User Account Pictures Be Stored in Windows 11?
In Windows 11, the default user account picture is stored in the following location.
C:\ProgramData\Microsoft\User Account Pictures
The ProgramData folder will be hidden, change the folder option to show all hidden files.
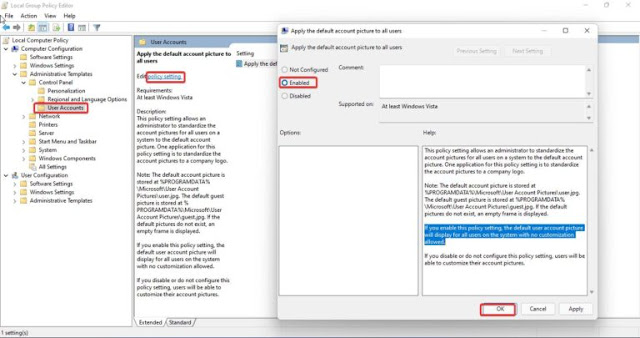
Apply Default User Account Image to All Users:
First you need to choose any image, for example, if you want to put a company avatar, select that image and resize it according to the following dimensions. And rename the pictures as shown below.
- 448 x 448px (user.png)
- 192 x 192px (user-192.png)
- 48 x 48px (user-48.png)
- 40 x 40px (user-40.png)
- 32 x 32px (user-32.png)
Use MS Paint to resize your image to the dimensions mentioned above.
Next, navigate to the following path where the User Account Picture will be stored.
C:\ProgramData\Microsoft\User Account Image
Now you can see the default user account pictures in different sizes, now you need to rename those files as mentioned below.
- User.png - User.png.bak
- user-192.png - user-192.png.bak
- user-48.png - user-48.png.bak
- user-40.png - user-40.png.bak
- user-32.png - user-32.png.bak
after you rename those files from folder then copy and paste the image that you resized and renamed into above mentioned folder.
Next restart your PC once for it to work properly.
Using Registry Editor:
Note: Modifying the Registry is risky and it causes irreversible damage to your Operating System Settings Follow the steps correctly. Friendly advice Before modifying the registry it is recommended to create a restore point.
1. Open the Run command by pressing Windows Keys + R and typing regedit and pressing enter, this will open the Registry Editor
2. Now navigate to the following path.
HKEY_LOCAL_MACHINE\SOFTWARE\Microsoft\Windows\CurrentVersion\Policies\Explorer
3. From the left side, right click on the Explorer registry key and select New > DWORD (32-bit) Value and name it UseDefaultTile.
4. Next Double-click UseDefaultTile and set the value to 1, click Ok and close Registry Editor.
5. Restart the system to make it work. This will apply the default user account image to all user profiles.
Video:


No comments:
Post a Comment