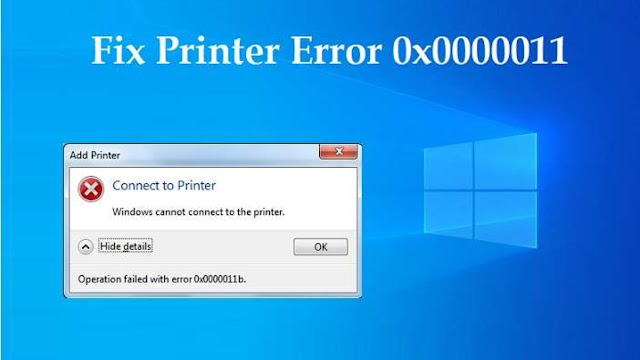
The conflict between the security update in January and the Windows Patch Tuesday for September has caused some users to get error 0x0000011b when printing over the network. If you get an error that cannot print over the network, error code 0x0000011b, then this article will give you a solution.
In January 2021, Microsoft released a security update to fix the "Windows Print Spooler Spoofing Vlnerability" issue, error code CVE-2021-1678. In fact, this update does not automatically protect devices from the vulnerability. It creates a new Registry key that administrators can use to increase the level of RPC authentication commonly used for network printing.
In other words, this update does not patch the vulnerability unless a Windows administrator creates the following Registry key:
[HKEY_LOCAL_MACHINE\System\CurrentControlSet\Control\Print]"RpcAuthnLevelPrivacyEnabled"=dword:00000001
However, in the September Patch Tuesday, Microsoft has automatically enabled this setting by default for all Windows devices. Even if your machine has not generated the RpcAuthnLevelPrivacyEnabled key in the Registry, the protection is still enabled.
And as soon as this protection setting was enabled by default, Windows users started getting error 0x0000011b when printing over the network.
This error mainly occurs in home networks, and small businesses often cannot take advantage of Kerberos setup on Windows domains. Removing the September Patch Tuesday will help you fix the problem but leave your computer vulnerable to two PrintNightmare and MSHTML vulnerabilities that are being actively exploited by hackers.
So the temporary solution is to disable the CVE-2021-1678 vulnerability patch until Microsoft releases new instructions. This solution is less dangerous because CVE-2021-1678 is not actively exploited by hackers.
Details on how to fix network printing error 0x0000011b
Method 1: Install update KB5005611, or KB5006670 (for Windows 10 21H1 users)
As Microsoft states, after installing update KB5005565, devices that try to connect to a network printer for the first time may not download and install the necessary printer driver, causing error 0x0000011b. This issue is fixed in KB5005611, so please continue to download and install KB5005611 from Microsoft Update.
Besides, Windows 10 21H1 users only get this error after installing cumulative update - KB5006670. Therefore, the temporary solution is to remove the update KB5006670.
In addition, in theory, if the above two updates are not found, you can try to remove the most recent update or the update before the date of the error.
Method 2: Add a network printer that uses a local port
Another way to fix error 0000011b when installing a network printer on Windows 10 is to add the printer manually using the local port.
1. Navigate to Control Panel > Devices and Printers.
2. Click Add a printer.
3. On the next screen, click The printer that I want isn't listed.
4. Select Add a local printer or network printer with manual settings and click Next.
5. Click Create a new port and select Local Port from the drop-down menu. Click Next.
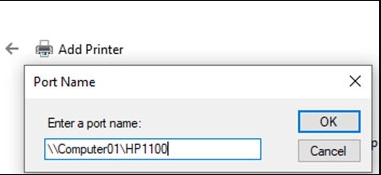
6. On the screen, specify the port name in one of the following formats and press OK:
- \\ComputerName\SharedPrinterName
- \\ComputerIPAdress\SharedPrinterName
Eg:
a) If the name of the computer using the network printer is Computer01 and the name of the printer is HP1100, the port name is \\Computer01\HP1100
b) If the IP address of the computer using the network printer is 192.168.1.20 and the printer's name is HP1100, the port name is \\192.168.1.20\HP1100.
7. At the next screen, select the network printer model and click Next.
Note: If you cannot find the printer model here, download the printer driver from the manufacturer and then install the printer locally on your PC (LPT1). Once installed, repeat the steps in this method to manually install the printer using the local port option.
8. When the printer installation is complete, print a test page to test.
Method 3: Fix error 0x0000011b via Registry
To fix network printing error 0x0000011b without removing the update (KB5005565) you need to do the following:
1. Press Windows + R to open Run then type regedit and then press Enter to open Registry Editor.
2. Find the key:
HKEY_LOCAL_MACHINE\System\CurrentControlSet\Control\Print
3. Create a new DWORD-32 bit value named RpcAuthnLevelPrivacyEnabled and set its value to 0 like the picture you can see below:


No comments:
Post a Comment