Whether you're downloading Windows 11 or sticking with Windows 10 for a while, it's easy to take a screenshot to capture part or all of your screen. Maybe you want to save your receipts online, or maybe you want to jot down a particularly remarkable gaming feat to show off to your friends. Windows 10 and 11 offer the same built-in tools (Snip & Sketch and Snipping Tool) and some keyboard shortcuts that will let you take screenshots instantly.
Here, we will show you how to use both the built-in screenshot tool in Windows and other keyboard shortcuts to take screenshots in Windows 10 and Windows 11, so you can decide which one. i like the most.
Plus, here are many of the top Windows 10 tips and tricks, how to use all the new features in Windows 11 and what you need to know about upgrading from Windows 10 to Windows 11.
1. Print screen button
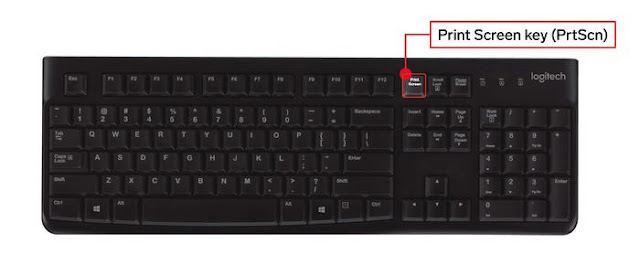
The easiest way to take a screenshot on Windows 10 or Windows 11 is to use the Print Screen (PrtScn) key. To capture the entire screen, simply press PrtScn in the upper right of the keyboard.
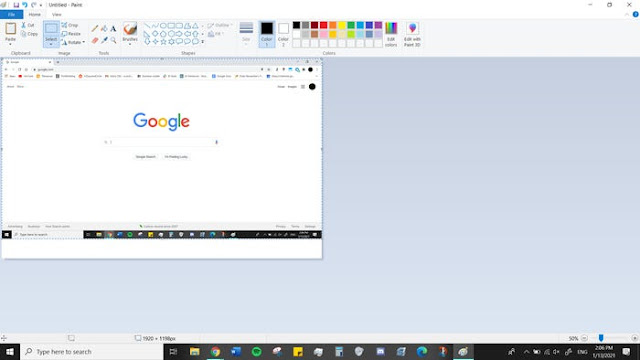
In Windows 10, the screenshot will be copied to your clipboard. To save the file, paste the screenshot into any program that allows you to insert images, like Microsoft Word or Paint.
In Windows 11, pressing PrtScn saves the screenshot to your computer's dedicated Screenshots folder - you can find it by opening File Explorer and clicking Pictures on the left side. And if you have it enabled, it will also save the screenshot to your OneDrive.
2. Windows Key + Print Screen
To take a screenshot on Windows 10 and automatically save the file, press Windows key + PrtScn. Your screen will dim and a screenshot of your entire screen will be saved in the Screenshots folder.
In Windows 11, pressing Windows key + PrtScn will save your full screen image to the Screenshots folder and copy the picture to your clipboard. This will allow you to instantly paste a photo onto a social media post, art app, and more.
3. Alt + Print Screen
To capture only the active window you are working on, press Alt + PrtScn. In Windows 10, it will copy it to your clipboard, so you'll need to paste it in another program to save it; in Windows 11, it will copy and save to the Screenshots folder immediately.
4. Snip & Sketch Tool in Windows 10
To activate Snip & Sketch, use the keyboard shortcut Windows Key + Shift + S. Your screen will dim and a small menu will appear at the top of the screen, giving you the option to capture a rectangle, freeform, windowed or full screen capture.
With these Snip & Skitch options, you can choose how you want to take screenshots:
Function Mode
- Rectangle: The size of the rectangle for your screenshot.
- Free-form: Hand drawn with your cursor.
- Window: Select a specific window to capture.
- Full-screen: Get an image of your entire screen.
After you take a screenshot, it will be saved to your clipboard and a preview message will appear in the lower right corner of your screen.
Click the preview message to open the Snip & Sketch app and save, share, or edit the screenshot using the available drawing tools.
5. Snipping Tool in Windows 11
The Snipping Tool exists in Windows 10, but it's usually not the screenshot tool you want to use. But in Windows 11, Snipping Tool got a big upgrade and it is now the best way to take custom screenshots.
To launch the Snipping Tool in Windows 11, you can either search for it or just press Windows key + Shift + S. Like with Snip & Sketch, your screen will dim and the screenshot options toolbar will appear at the top of the screen. This toolbar will allow you to take a rectangular, freeform, full window, or full screen image.
After you take a screenshot, it's copied to the clipboard so you can share it immediately. And if you click on the preview that pops up in the bottom right corner of the screen, you'll be able to save and edit it.
Video:
7. Power + Volume Up
To take a screenshot on Windows 10 using a Microsoft Surface device, press the Power Button + Volume Up Button. The screen will dim and your screenshot will be saved to the Pictures > Screenshots folder.
Note: To take a screenshot on Surface 3 and below, you need to tap Windows Logo + Volume Down Button.


No comments:
Post a Comment