In most cases, not being able to run Windows 11 is tied to not meeting the minimum requirements of the operating system.
- this pc does not currently meet windows 11 system requirements
- the pc does not support secure boot
- the pc does not support tpm 2.0
The majority of the Windows 11 minimum system requirements aren't much different from those of Windows 10. In fact, the requirements for GPU and CPU and RAM are very modest, and most computers will meet Microsoft's minimum standard.
In this video, I will show how to get around the new hardware requirements for Windows 11, like TPM 2.0, secure boot or an unsupported processor. I will create a bootable USB drive that combines the Windows 10 installer with the Windows 11 installation files to do so. To demonstrate that this method is working, I'll install Windows 11 on an unsupported PC. This goes without any issues, full compatibility and updates are working as expected.
This tutorial will apply for computers, laptops, desktops, and tablets running the Windows 11 operating system (Home, Professional, Enterprise, Education) from all supported hardware manufactures, like Dell, HP, Acer, Asus, Toshiba, Lenovo, Huawei and Samsung.
1. You need to create a new folder Windows 11
2. Download the Windows 11 ISO image file. Right-click on it. Select the “Mount” option from the contextual menu. It will extract all the files.3. Next, Copy the Windows 11 iSO files. And Paste it into the new Windows 11 Folder (The folder we created first ).this is really important because we need to modify one file in the source folder to get it working properly.
4. Once all files have been successfully copied. you need to do a very simple thing. you just need to open the folder called Sources.Once you are in this folder. you need to find the file called appriserres.dll.
5. Open appriserres.dll with Notepad6. Find AssetTypeForTPMVersion and remove it
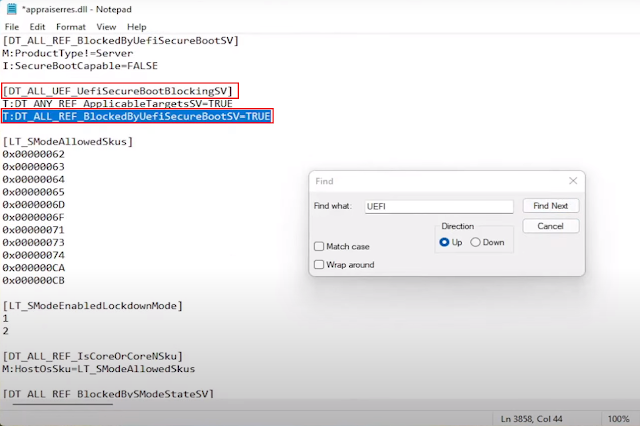
8. Next, Find UEF_UefiSecureBootBlockingSV=TRUE and remove it
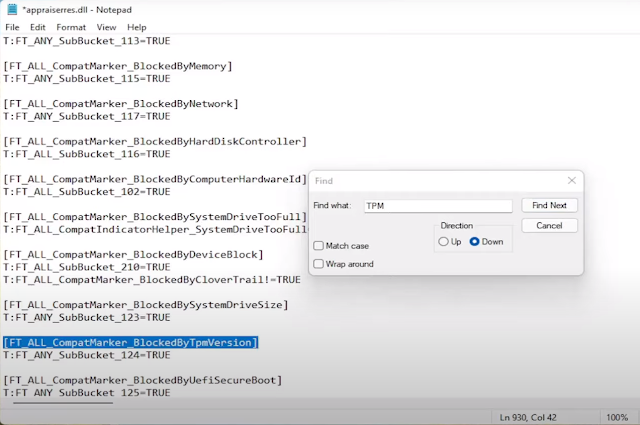
9. Next, Find CompatMarker_BlockedByTpmVersion and remove it
11. Next, Find LT_AssetTypeForTPMVersion
12. Next, Find all TpmVersion and remove it (remove 2 TpmVersion)

13.Next, Find TPM=FT_ALL_AssetTypeForTpmVersion and remove it
14. Next, Find TpmVersion=I:AssetType and remove it
15. Next, Find T:DT_ALL_TpmVersionBlockingSVSetup=TRUE and remove it
16. Next, Find LT_TpmInvalidStates and remove it
16. Next, Find DT_ALL_REF_BlockedByTpmVersionSV and I: TpmVersionInfo=LT_TpmInvalidStates and remove it
16. Next, Find DT_ALL_REF_BlockedByTpmVersionSV and T: DT_ALL_REF_BlockedByTpmVersionSV=TRUE and remove it
18. Next, Find DT_ALL_REF_BlockedByTpmVersionSVSetup2 and remove it
19. Next, Find I : TpmVersionInfo=LT_TpmInvalidStates and remove it
20. Next, Find DT_ANY_REF_BlockedByTpmVersionSVSetupHelper and remove it
21. Next, Find DT_ANY_REF_BlockedByTpmVersionSVSetup=TRUE and DT_ANY_REF_BlockedByTpmVersionSVSetup2=TRUE and remove it
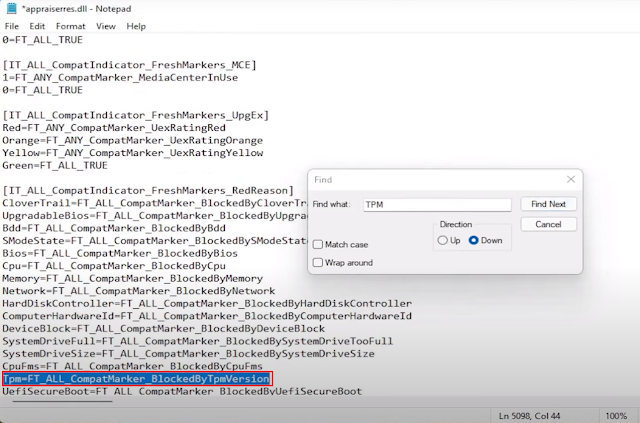
23. Next, Find Tpm=I:Marker_BlockedByTpmVersion and remove it
28. Next, Find T:DT_ALL_REF_BlockedByUefiSecureBootSV=TRUE and remove it
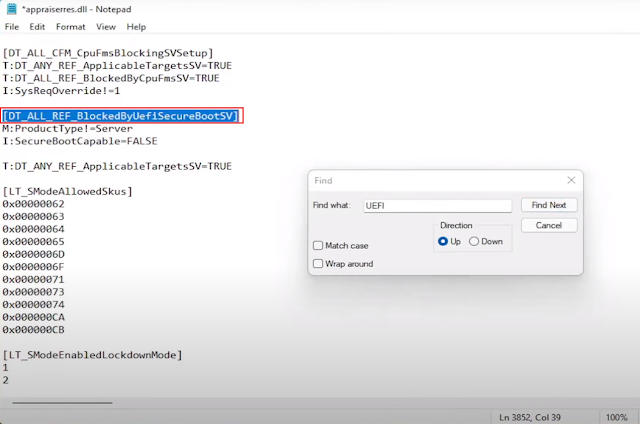
29. Next, Find DT_ALL_REF_BlockedByUefiSecureBootSV and remove it
30. Next, Find T:DT_ALL_REF_BlockedByUefiSecureBootSV=TRUE and remove it
31. Next, Find all "UEFI" and remove all.
31. After deleting "UEFI". Save as the file appriserres.dll to Desktop. You need to replace this appriserres.dll file with a new file. Paste and Replace the file into the Sources folder.


No comments:
Post a Comment