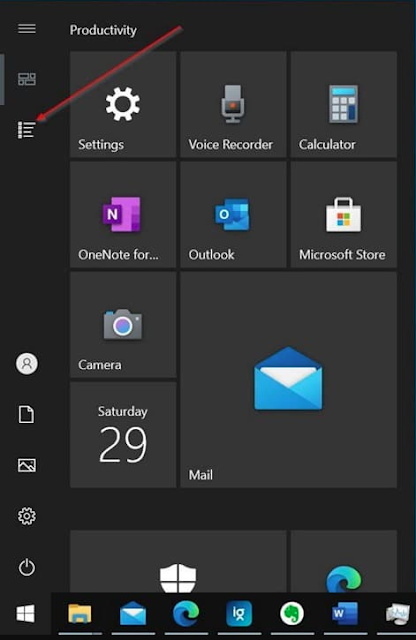
With the default settings, the Windows 10 Start menu shows a list of apps to the left of the Start menu, and pinned tiles show up to the right of the Start menu.
The apps list shows the apps installed on your Windows 10 PC, including recently installed apps. You can scroll through the application list to access any of the apps or programs installed on your PC. The right side of the Start menu shows the apps and folders pinned to the Start menu.
However, many PC users feel that the app listing doesn't have much of an effect because they use the search function to launch the app. If you also use the Start / taskbar search to run the app, you can turn off the application list and show only Start menu tiles.
The best part is that you can view and access the app list even if it is disabled by simply clicking its icon in the left pane.
To only show app tiles on Start, you need to clear the app list to the left of Start. Clearing the app list will force Start to display only the app tiles. Fortunately, the app list can be turned off right from the Settings app.
1. Open the Settings app. Go to Personalization> Start Page.
2. Here, turn off the option titled Show app list in Start menu to remove the application list from Start and only show the boxes on the Start.
To show the app list again, turn on the Show apps list option.
Access the application list when it is disabled
You do not need to turn on application list in Settings to access it. When the application list is disabled, click the application list icon in the left pane (refer to the figure below) to view the application list.
Video:


No comments:
Post a Comment